How to Make a Banner in Minecraft | Crafting, Copying, and Using Banners
Table of Contents
Banners were added to Minecraft in version 1.8, which means they have been a part of the game for over six years! Since then, they have had multiple changes, including new forms of usage, new patterns, and new colors. In this guide, we will cover how to make them.
How to Make and Use a Banner in Minecraft
Banners are very easy to make and could be considered an early-game item. If you feel you've found the perfect permanent base for your world, why not decorate it with its very own Banner and insignia?
Crafting
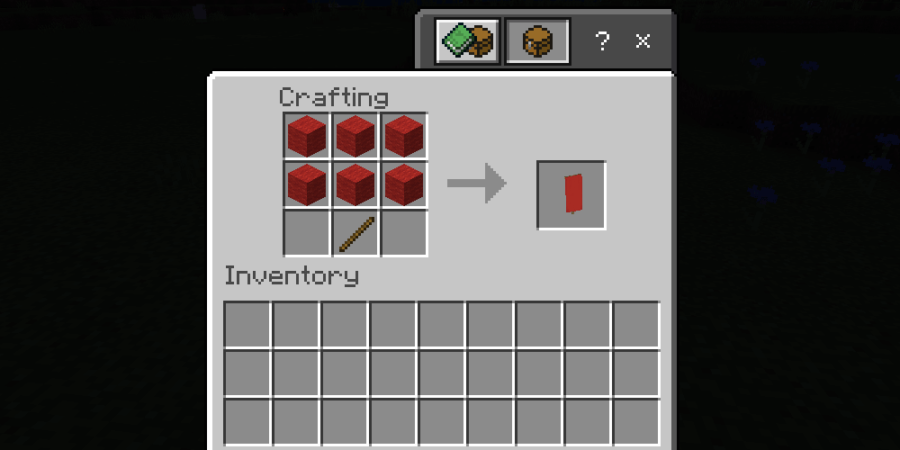
To craft a Banner, you'll need the (easy-to-access) crafting resources listed below.
- 1 x Stick
- 6 x Wool (any matching color)
When you have the ingredients above, simply place them in the Crafting Table in the pattern shown in the image above. If, for some reason, you can't see the image, follow these instructions:
Once you have done that, you'll have a Banner with a background color that matches the color of the Wool you chose. As we said: easy to make, even in the early game!
Usage
There are many different usages of a Banner. Still, the primary one is to make an insignia/design to represent your Minecraft base. Using a banner is also an excellent way to declare faction intentions and territory on Multiplayer servers. The list below provides a rough outline of how to use Banners in different ways.
- Placement: Placing a Banner is similar to the placement of any other placeable item. You simply make sure there is enough room for it (must be placed against a wall at least two blocks high by one block wide) and use the secondary action button to place it.
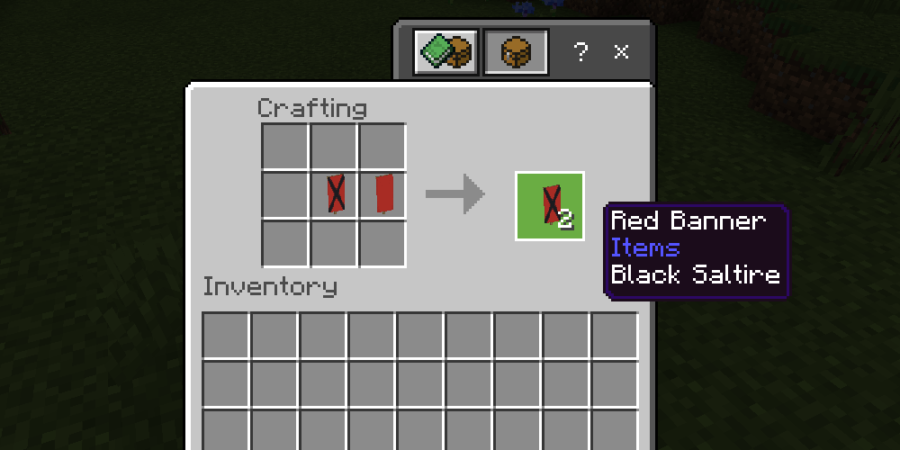
- Copying: You can copy a Banner more easier than designing it! Simply place the Banner in a Crafting Slot along with a blank Banner with the same background color as the original.
- Shield: You can place a Banner with any pattern on your shield to make a shield with the same pattern.
- Patterns: You can put a pattern on your Banner either by Crafting or by using a Loom. The Loom is the best option for setting a pattern. It uses far fewer resources and allows for easier flexibility of each individual resource.
- Map Marker: If you use a held Map (secondary action button) on a Banner, it will place a marker on the Map with the Banner's background color. Repeating this process removes the marker.
- Renaming: You can name a Banner by placing it in an Anvil and giving it a name.
- Fuel: You can use a Banner as fuel in a furnace. This doesn't provide a lot of fuel, though, so it's not worth it.
- Note Block: If, for whatever reason, you want to use it for sounds, you can place it under a Note Block. It produces a Bass sound effect.
Now that you know how to make and use banners, you can properly represent your faction on Multiplayer Servers or Pillager Raids! Make your name known!
Now that you have an insignia, why not form an army of Wolves! Check out our guide on How to Breed Dogs in Minecraft!
ncG1vNJzZmiooqS0ornEoKyinJWoe6S7zGikoqaVmL%2BistNon6ivXam8brnApJxmmV2Xrq%2B6xKtkoqZdoravscKrmJ%2BsXZi%2ForLToqWgZZOkvbq1zaBkmqaUYsK0tc2gZJuZnqOys7%2BO